Introduction to Thick Client Penetration Testing – Part 1
July 29, 2017
Java Deserialization Exploit Resulting RCE on Thick Client Penetration Testing – Part 3
August 5, 2017
After getting the basics of thick client pentest, let’s delve into the very first steps you can take to commence thick client pentest.
Interception and setting up proxy of application.
Thick clients can be broken down into two types based on proxy settings:
- Proxy aware
- Proxy unaware
Proxy aware are those applications which has settings in the application itself to route through IP address and ports for the purpose of logging in the application as well as transmit and receive data.
Whenever you log into the application, you will be given a prompt showing username/ password along with destination IP and port.
In case where the application does not have such settings, and only accepts username and password for authentication, you have to redirect the traffic from the application to your system to the actual server. This is the case of proxy unaware thick clients.
Thick Clients Classification :
- Exe files or
- Web based launching thick clients example: JNLP files ( Java based : Java Network Launch Protocol).
For exe files, you can directly install them on system and use tools such as Echomirage.
For those thick clients which connect to a particular domain and keeps sending requests, you can map burp suite to intercept the same and hook into the traffic to intercept the requests.
Steps Involved In Traffic Analysis For Thick Clients:
The very first step involves in getting the hostname of the thick client application’s url. We need to capture the particular traffic going through this url to our own machine.
Step 1: Ping the url you have got for testing (say www.thickclienturl.com)
Step 2: Note the reply ip address you get in the cmd console.
Step 3: Now we need to know on which ports is the application interacting to send traffic. Now launch wireshark and activate it to capture active packets.
Step 4: Now run the thick client and login with your valid credentials and let Wireshark capture traffic for some time.
Step 5: Say after 10 minutes or so, go to wireshark statistics and find the particular ip in order to determine the ports being used.
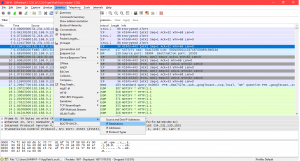
Traffic Analysis using Wireshark
Step 6: Click on IP destinations and you will be presented with a similar screen as below:
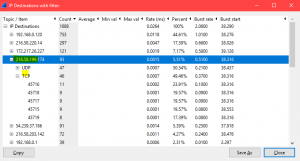
Discovery of ports used by application
Step 7: As you can see, suppose the above IP is the actual IP resolved while we pinged the url from the cmd in step 1, just expand the url and you can see the ports under TCP which are being used by the application to perform communications.
Keep a note of the 1. URL and 2. The TCP Ports (since we will need to intercept modifying these settings)
Step 8: Add the hostname of the domain to your hosts file, so the system thinks that the hostname’s server is the machine itself (this helps to capture the traffic from the proxy unware thick client to your interception proxy)
Step 9: Modify the hosts file in your system ( C:\Windows\System32\drivers\etc\hosts)
Step 10: Open any text editor and launch the hosts file inside it.

Hosts File Setting
Step 11: Now the actual server of the application won’t hit but remain inside your system, from where you can forward the traffic to your actual server.
In short, under normal scenario:

Normal Client Server Communication
While for interception it’s like this:

Intercepted client server communication
Step 12: So now whenever you fire up the application, the traffic from the application will be redirected to your own system from where you can intercept the request response and then forward it to the actual server.
Step 13: Now that we have configured the preliminary settings, let’s configure burp to understand the same, so we can intercept the traffic for the same.
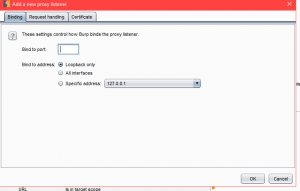
Port Binding via Burp Suite
Step 14: Here we have to use multiple bind to ports to capture the traffic hassle-free. The data we have from our initial assessment, we need to populate here.
Step 15: Assuming the above IP captured in wireshark (216.58.199.1174) is the IP for our thick client ( www.thickclienturl.com) and the ports are 45716,45717,45718,45719, we setup the following in burp:
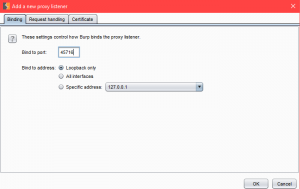
Port Binding via Burp Suite
Similarly, for all the ports we keep adding the above setting.
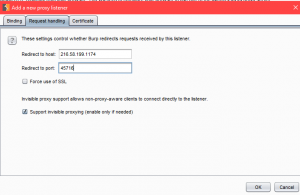
Actual host re-direction setting : Burp
Finally, we will see the following proxy option set:
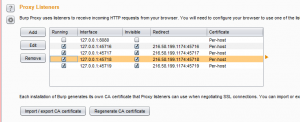
Proxy Settings in Burp Suite for thick client
Step 16: Make sure to enable the ‘invisible proxying’ option in burp, since we are intercepting proxy unaware applications this option will instruct Burp that its interface should be an emulated web server interface rather than the typical proxy style interface that’s used by default.
Step 17: Once this is done, now restart the thick client, keep your burp interception on and enter the user id credentials, you will see burp starting to intercept the traffic in the application!

Request/ Response Interception
Key points:
We saw how to intercept traffic for thick clients using Burp Suite. ( note this only holds for http protocol thick clients, for non http protocol thick clients, we need to use other tools like fiddler)
Vulnerabilities at a glance while performing thick client pentest where we can fuzz all the user input fields with different payloads to find vulnerabilities includes:
Improper error handling
SQL Injection
Parameter Tampering
Insecure Storage
Denial of Service
Reverse engineering
Broken access control
Session management

